
GANDHINAGAR: Let’s start with something honest: people will forgive a lot of things in a podcast—but poor sound isn’t one of them.
You could have the most compelling guests, thoughtful commentary, or hilarious banter, but if your audio sounds like it was recorded through a pillow or inside a tiled bathroom, many listeners won’t give it a second chance.
But here’s the good news: you don’t need a studio or a high-end budget to sound professional. You need three things:
- A little technical understanding
- Thoughtful preparation
- The willingness to pay attention to the details others skip
This guide is here to walk you through that process—from choosing whether to script or free-form, to preparing your space and gear, to recording smartly and editing with intention. If you’ve ever wondered “how do they make it sound so good?”—this is how.
🎭 Scripted or Spontaneous? Choosing the Right Structure
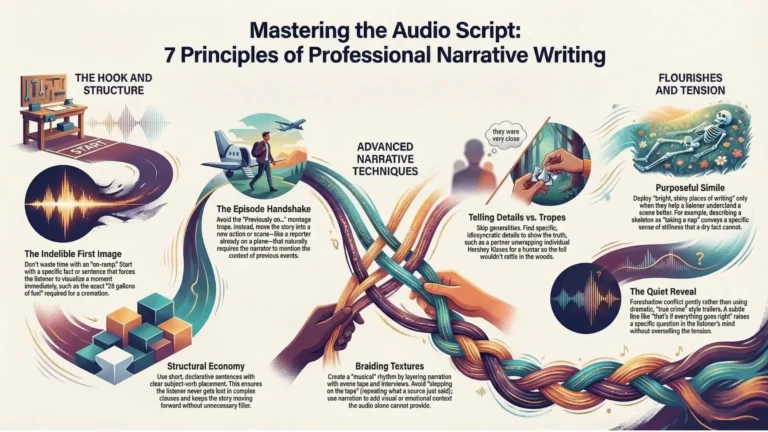
Before you even hit record, you need to decide how you’re going to deliver your content. And that decision—whether to script, outline, or improvise—shapes everything that follows.
Option 1: Fully Scripted (Ideal for Storytelling or Solo Formats)
Writing out every word might sound rigid, but for narrative podcasts, solo episodes, or research-heavy formats, it’s a solid approach. Why?
- You control the pacing, tone, and delivery.
- You avoid verbal crutches (“um,” “like,” “you know”).
- You minimize editing time later.
If you’re nervous on the mic, scripting is your safety net. It helps you communicate clearly, stick to your points, and come across as polished—even if you’re recording in your bedroom closet.
That said, don’t write like you’re writing an essay. Instead:
- Use contractions (“you’re” instead of “you are”).
- Write in short, clean sentences.
- Read it out loud as you go—if it doesn’t sound like something you’d say in real life, rewrite it.
Many producers at the National Public Radio (NPR) in the US follow this exact process. Their secret? They “script aloud”—writing while imagining the rhythm of natural speech.
Option 2: The Loose Outline (Ideal for Interviews, Panels, and Co-Hosted Shows)
If your show leans on conversation—like interviews, discussions, or news recaps—a full script can make things sound stiff or over-rehearsed. That’s where outlines shine.
An outline keeps you:
- Focused on your key ideas or segments
- Free to follow the natural flow of conversation
- Anchored when things start to wander
Your outline might include:
- A hook or intro blurb
- Bullet points for each segment or topic
- Questions for your guest
- Ad breaks, transitions, and calls to action
This method balances structure with spontaneity. Jesse Thorn (host of “Bullseye”) swears by deep preparation—not just to ask questions, but to be present enough to improvise when the conversation gets interesting.
Option 3: Hybrid (What Most People Eventually Settle Into)
Many podcasters use a blend: scripted intros and outros, detailed outlines for episodes, and room for improvisation. As you gain experience, you’ll find what’s right for your format and your voice.
The key is consistency. Whether scripted or spontaneous, your goal is to sound intentional, not accidental.
🎧 Your Recording Environment: Where Sound Quality Really Begins
Let’s bust a myth: gear is not the most important factor in great audio. Your recording environment is.
A $300 mic in a bad room will sound worse than a $50 mic in a thoughtfully prepared space. So let’s start with what’s around you.
Step 1: Silence the Space
Choose a room where you have control. Your best options:
- Carpeted rooms
- Spaces with soft furniture (sofas, beds, curtains)
- Rooms without a lot of echo (avoid tiled floors or bare walls)
Before you record, eliminate sound distractions:
- Turn off fans, AC, fridge hums, and buzzing lights.
- Silence your phone and computer notifications.
- Ask housemates or family to keep the volume down.
Step 2: Embrace Softness
Hard surfaces reflect sound. Soft surfaces absorb it. The goal is to reduce echo, reverb, and reverb “tail” (the subtle echo trailing your voice).
Simple hacks:
- Hang a thick blanket behind you.
- Stack pillows in front of reflective walls.
- Use a clothes-filled closet as your recording booth.
Don’t overthink it—think creatively. Your bedroom might be a better podcasting space than your living room.
🎙️ Choosing and Using Your Mic Like a Pro
You don’t need top-tier tech. You need gear that fits your goals and space, and you need to use it properly.
Dynamic vs Condenser Mics
- Dynamic microphones are less sensitive. Great for noisy rooms and everyday podcasters. Affordable and reliable.
- Condenser microphones are more sensitive, capturing fine vocal detail. But they’ll also pick up background noise and require a quieter environment.
Beginner-friendly options:
- Samson Q2U (USB/XLR hybrid)
- Audio-Technica ATR2100x
- Rode NT-USB Mini
- Blue Yeti (popular, but sensitive—position it carefully)
Mic Technique: Small Details, Big Difference
- Distance: 4 to 6 inches from your mouth.
- Angle: Position slightly off-center (to reduce plosives like “p” and “b” sounds).
- Pop filter: Use one. It diffuses bursts of air from your mouth.
- Mic stand or arm: Don’t hold your mic—your hand movements create handling noise.
If you’re interviewing someone or co-hosting, each person needs their own mic, ideally on separate tracks. Sharing one mic is a recipe for uneven sound and a messy edit.
📈 Setting Audio Levels: Why Volume Consistency Matters
One of the fastest ways to lose listeners? Audio levels that bounce all over the place.
What You Want:
- Dialogue that’s loud and clear, but not distorted
- No huge jumps between segments or speakers
- A comfortable, even listening experience
Tips:
- Use a sound check: Record a minute, play it back, adjust.
- Aim for levels peaking between -15 to -12 dBFS.
- Avoid the red zone (clipping = distortion).
- Use a loudness meter if your software offers it (target -24 LUFS for podcasts).
Wear headphones while recording. You’ll catch background noise and level problems on the spot, not in post.
🌬️ Capture Ambient Sound and Room Tone
Producers do this all the time: record 30 to 60 seconds of silence with your mic setup exactly as it is during the show. Why?
This is room tone—the natural hum of your environment. It’s invaluable in editing:
- Fills gaps between cuts
- Smooths transitions
- Makes edits seamless
If you’re recording outdoors or on location, gather a minute of ambient sound too—traffic, birds, crowd noise. These details help tell the story.
✂️ Editing: Where You Shape the Listening Experience
Once you’ve got your raw audio, editing is where you shape it into something worth listening to.
Start With Content Editing:
- Cut filler words (“like,” “um,” “you know”) and false starts.
- Remove long silences or off-topic tangents.
- Tighten up sections for better pacing.
Don’t over-edit. Leave in natural speech rhythms. A few “ums” are human. Robotic audio kills emotional connection.
Then Mix Your Sound:
Use editing tools like:
- Audacity (free and capable)
- Descript (AI-driven, visual editing)
- Reaper (flexible and affordable)
- Adobe Audition (industry standard)
Apply basic audio treatments:
- EQ: Cut muddy lows, brighten mids. Use presets if you’re unsure.
- Compression: Evens out loud and soft parts. Helps your podcast stay smooth throughout.
- Noise Reduction: Only if needed. Use gently to avoid a “watery” or tinny sound.
Balance Your Audio Tracks:
- Set your host track as the foundation.
- Match guest levels to it.
- Adjust music and ambiance to sit under the voices, never overpower them.
🎼 Add Music and Sound Design Thoughtfully
Music and sound effects elevate your show when used with intention. They can build tension, signal transitions, or just set the mood.
Where to Use Music:
- Intro and outro (build your brand identity)
- Segment transitions (use short stingers)
- Under moments of reflection or drama (keep it low and subtle)
Always use licensed music—never pull random songs off YouTube or Spotify.
Sources for royalty-free music:
- Artlist
- Epidemic Sound
- Free Music Archive
- Uppbeat
Sound Effects (SFX):
Add sparingly—just enough to create an immersive moment or signal change. Too much and it gets gimmicky.
🔊 Final Polish: The Mastering Stage
Before you publish, listen to the whole episode from start to finish—preferably with headphones, then again on regular speakers.
Ask yourself:
- Are volume levels smooth?
- Do transitions sound natural?
- Any weird cuts or background hiss?
If something stands out as distracting—fix it. If it flows and feels polished—you’re ready.
🎯 You Don’t Need Perfection, Just Progress
Every great podcaster you admire had a rocky beginning. Their first few episodes were clunky, too quiet, or over-edited. What made the difference? They kept going.
High-quality audio is about learning your tools, improving your habits, and never underestimating the power of listening. You’ll get better with every episode—because podcasting is a craft.
So start simple. Be thoughtful. Focus on clarity. And trust that your voice deserves to be heard—and heard well.
Let’s make some noise. 🔥